Khắc Phục Lỗi Chkdsk Cannot Continue In Read Only Mode Trên Windows
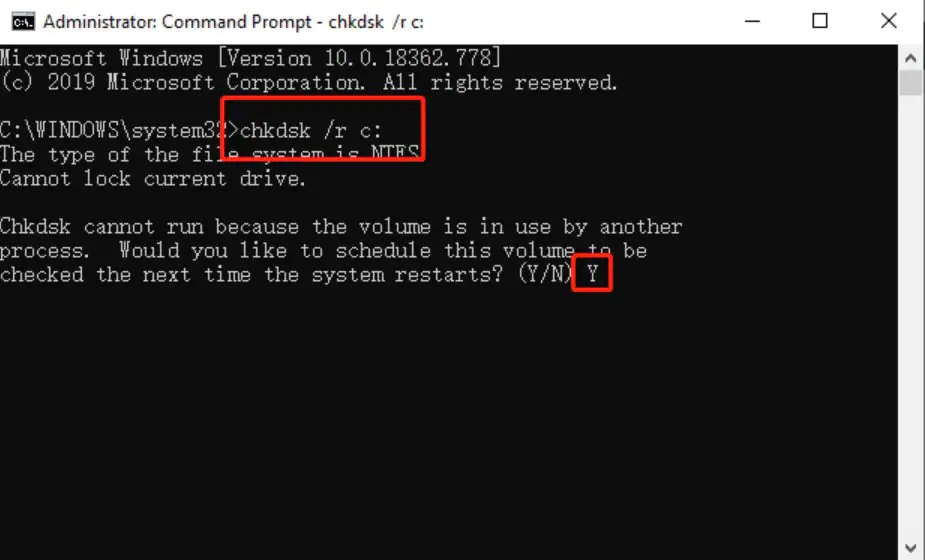
Step 1. Launch the Search menu by pressing the Wins + S key and type in Command Prompt. Step 2. Choose the Command Prompt (Admin) option from the search menu window. Step 3 . In the command prompt, input the command chkdsk /r c: and press on the Enter button to execute. Here, replace c with the drive letter on the PC.
“Chkdsk Cannot Continue In ReadOnly Mode” Error on Windows Bitwar Data Recovery
#1 Hi, I have corrupted file record segments that don't go away. I often get a message from Windows telling me to restart to fix drive errors. When I restart however, nothing gets fixed and I still.

Here Are Ways to CHKDSK Cannot Continue in Readonly Mode
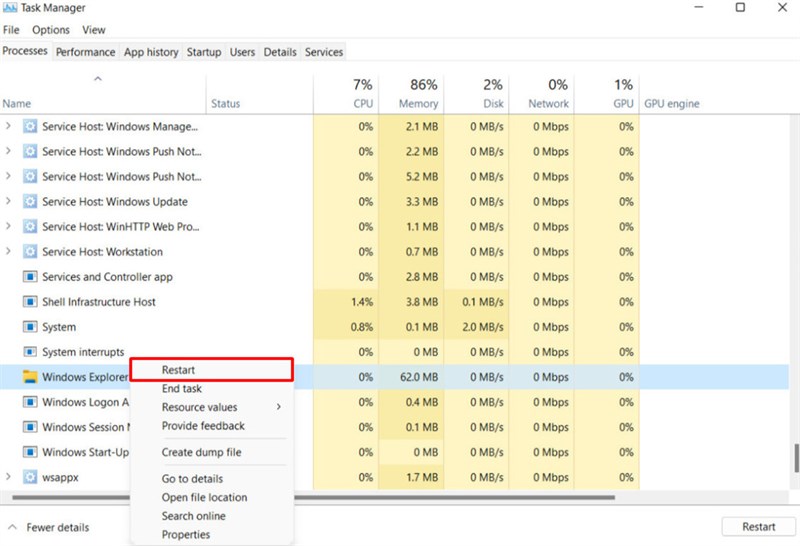
1. Close Active Programs and Restart File Explorer You'll likely encounter this issue if you're scanning a disk that's currently in use. So, the solution would be to close your active programs and see if that helps. If the issue persists, restart File Explorer through these steps: Press Win + X to open the Quick Access Menu.
[FIXED] "Chkdsk Cannot Continue In ReadOnly Mode" Error on Windows
Fix CHKDSK cannot continue in read-only mode If you receive this error message, here are a few things you could try to fix the issue on your Windows 11/10 system: Run CHKDSK from Recovery. Run.
Fixed CHKDSK Cannot Continue in ReadOnly Mode in Windows 7
Fix 1: Schedule a CHKDSK on Reboot The CHKDSK may often pop up if a particular drive is in use at that moment. To get around this problem you can set up a disk scan through CheckDiskUtility. Here's how, Launch the Power users menu by pressing the Win+X keys.
6 Methods To Fix CHKDSK Cannot Continue In Readonly Mode
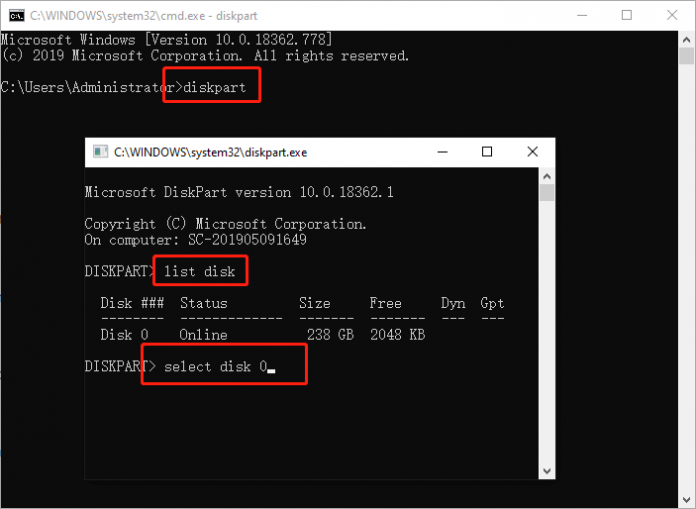
1. Click Start > All Programs > Accessories and then right click Command Prompt > Run as administrator to open an elevated command prompt. Tips: if you're prompted for a confirmation at User Account Control, choose the positive one. 2. Type chkdsk /r at the prompt and press Enter. 3. It will prompt to schedule CHKDSK on next restart.

6 Methods To Fix CHKDSK Cannot Continue In Readonly Mode
Solution 1: Running the CHKDSK Utility from the Recovery Section Solution 2: Running CHKDSK on Boot Solution 3: Disabling the Write Protection Feature One of the excellent features of the Windows operating system is the Check Disk (CHKDSK) utility. It efficiently verifies the integrity of the data kept on a hard drive.
How To Fix CHKDSK Cannot Continue in ReadOnly Mode YouTube
All Five Ways to Fix CHKDSK Read-only Mode: 1. Schedule a CHKDSK on Reboot 2. Remove Disk Read-only Using Diskpart 3. Remove Disk Read-only Using Software 4. Change Read-only Files to Normal 5. Close All Programs and Files Why CHKDSK Cannot Continue in Read-only Mode

Fix CHKDSK Cannot Continue in Readonly Mode 10 Solutions Start up, Data backup, Windows 10
Possible Causes of CHKDSK Cannot Continue in Read-only Mode Error If the target hard drive is marked read-only, namely, the disk is write-protected, then this CHKDSK error will occur. Is there a possibility that the target drive is being used by another program or process?
How To Fix ‘CHKDSK Cannot Continue In Readonly Mode’ Error In Windows 10?
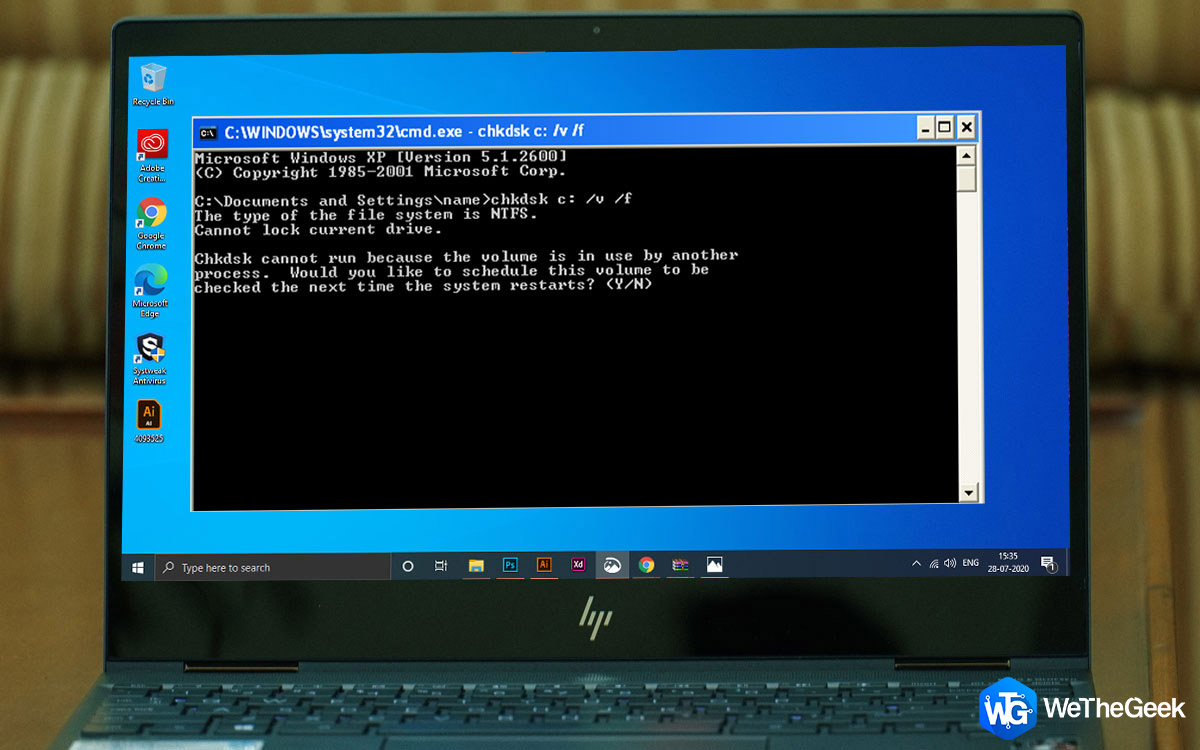
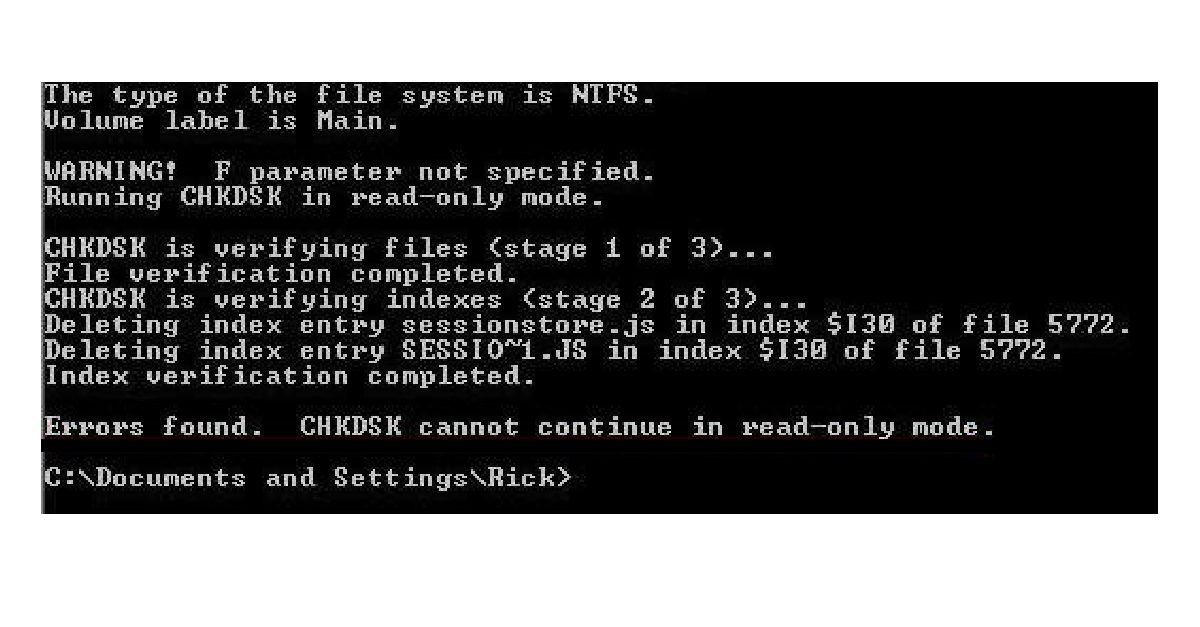
Here is result after chkdsk /r: XML: C:\Documents and Settings\Owner>chkdsk The type of the file system is NTFS. WARNING! F parameter not specified. Running CHKDSK in read-only mode. CHKDSK is verifying files (stage 1 of 3). File verification completed. CHKDSK is verifying indexes (stage 2 of 3).
8 Ways to Fix 'CHKDSK Cannot Continue in Read Only Mode' Error
1. Try Scheduling a CHKDSK on Reboot. The "CHKDSK cannot continue in read-only mode" might occur because you have used the drive you're using to repair. Thus, you can fix this issue by scheduling a CHKDSK on Reboot. 1. Press the Win+X keys and open the Power users. Next, you'll need to choose the command prompt icon. 2.

Fix CHKDSK Cannot Continue in Readonly Mode 10 Solutions in 2020 Windows 10, Windows
In File Explorer, right-click the drive you want to check, and then choose "Properties." In the properties window, switch to the "Tools" tab and then click the "Check" button. In Windows 7, the button is named "Check Now." In Windows 10 and Windows 11, Windows may inform you that it hasn't found any errors on the drive.
CHKDSK cannot continue in readonly mode ErrorTools
Examples. To check the disk in drive D and have Windows fix errors, type: chkdsk d: /f If it encounters errors, chkdsk pauses and displays messages.Chkdsk finishes by displaying a report that lists the status of the disk. You cannot open any files on the specified drive until chkdsk finishes.. To check all files on a FAT disk in the current directory for noncontiguous blocks, type:
8 Ways to Fix 'CHKDSK Cannot Continue in Read Only Mode' Error
The following 8 methods can help you to fix 'CHKDSK cannot continue in read-only mode' error easily, just follow the steps. Check disk on next reboot Execute CHKDSK in recovery environment Change read-only mode to normal mode Remove write protection on disk Close all running files or applications Scan for and remove viruses or malware

6 Methods To Fix CHKDSK Cannot Continue In Readonly Mode
Hi All, I'm getting "Error: CHKDSK cannot continue in read-only mode" message when I run the chkdsk.exe programmatically. But the same will work properly If I run through command prompt. Code snippet for reference: ProcessStartInfo startInfo = new ProcessStartInfo ("C:\\Windows\\System32\\chkdsk.exe", "C:"); startInfo.UseShellExecute = false;

How to Fix CHKDSK Cannot Continue in Read Only Mode?
The CHKDSK cannot continue in read-only mode issue is caused by a variety of reasons that involve the following: The disk comprises a read-only file system The disk might be affected by malware or viruses A corrupted hard drive When the running process or program is using the target drive